 |
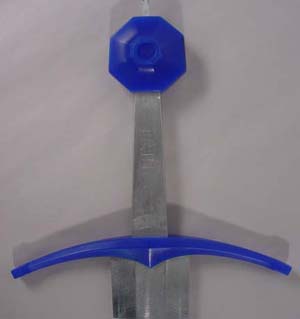
The wax
originals for the NextGen Prince
by Peter Johnsson
|
For
a sword to fullfill its potential, it is vitally important that the
hilt is properly made.
The mass of the pommel must be adjusted for best possible heft and
performance of the blade. Guard and pommel must be mounted with a
sturdy and precise fit. The grip must be shaped to allow a good control
of the blade and a secure purchase. The hilt should also have good
proportions and be made in a style that is in accord with the historical
period and type of the sword.
To look right, the hilt components need to capture the subtleties
of volume and form that original hand-forged hilt components possess.
Working from Peter's exhaustive documentation of originals in museums
and private collections, the designs are based on his detail drawings
and hundreds of photographs of original pieces.
As a result of Peter's research, wax models can be made that reflect
the character and shape of hand-forged originals while lending themselves
to a production environment. Investment casting from a hand-carved
wax original is the closest we can come without hand-forging each
original piece, which would be time consuming and make our swords
prohibitively expensive.
It is important to note that Albion uses only the more expensive and
precise investment casting process (also known as the
"lost wax" method), rather than the less expensive and easier sand-casting
process. Sand casting can be perfect for certain applications, but
the subtleties demanded by our recreations cannot be achieved through
this method.
Many hours of exacting work are invested in the making of the hilt
components from wax original to finished piece ready to be mounted
on a sharp blade.
Step One
|
|
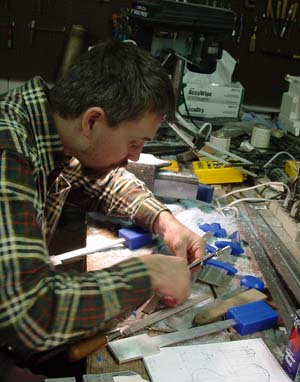
Peter Johnsson
carving a wax original from his drawings
|
An
original master for each component is carved from a block of hard
modeling wax.
This is a painstaking process and requires hours of carving and polishing.
The wax original must incorporate all of the details and capture the
characteristic shape of the original.
The correct size of the pommel is arrived at by testing a prototype
blade for optimum balance in handling and performance.
The volume of the wax original is then calculated, making allowance
for what material is used for casting the pommel (bronze and steel
have different specific weights) and shinkage in the molding and casting
process (which amounts to 3-5%. )
Step Two
 |
Leif
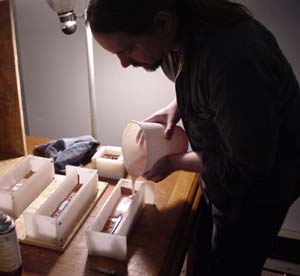
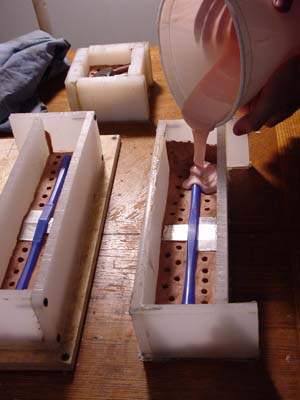
Hansen making a production mold for the NextGen line
|
Once
a wax original is made, it must be molded in two matching halves.
It is from these molds that the investment or production waxes will
be made.
It is critical that the mold be perfect and durable enough to produce
waxes time after time which will be true to the original in every
detail and require as little clean-up as possible.
Step Three
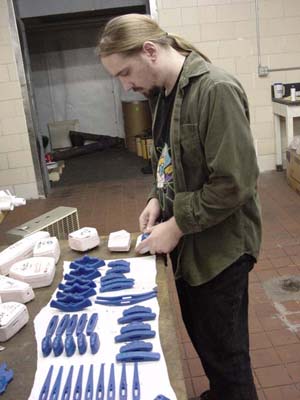 |
Leif
pulling investment waxes from the production molds.
|
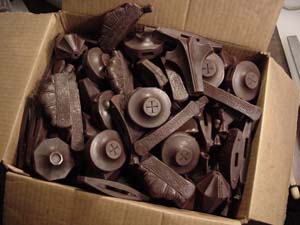 |
| Rough
investment waxes from the production molds, prior to clean-up. |
Waxes
are poured in these molds on a production schedule, anticipating demand
for the pieces being produced.
Each wax is poured, allowed to cool, and then removed from the mold.
The waxes are examined for flaws or surface blemishes and are either
repaired or rejected.
Many hours are spent pouring, examining and preparing waxes for casting.
Rejected waxes are re-melted and the wax reused.
Each investment wax made from these molds is used only one time, as
it is destroyed in the investment process.
Step Four
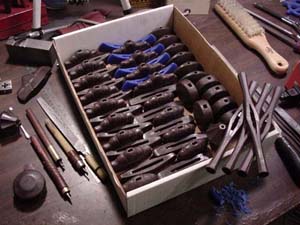 |
NextGen
waxes ready to be shipped to the foundry
|
Waxes
are sent to the foundry for investment and casting. Albion uses only
small US foundries for the casting of our hilt components.
Prior to investment, the waxes are "sprued," which means that ”branches”
of wax are attached that will act as pouring gates and vents (to allow
gasses to escape from the molten metal.)
After the waxes are sprued, they are submerged in liquid investment
solution -- a slurry much like ceramic (for more detailed pieces,
investment solution is often pre-painted on the wax, either with a
brush or by spray-painting).
This coating is treated the same as any ceramic or clay pot -- it
is allowed to dry and is then fired in a kiln, upside down, to both
harden the ceramic shell and to "burn out" the investment wax.
The now empty investment shell has a "negative space" inside, which
will receive the molten metal and form it to the shape of the original
wax.
When the piece is cast, it is sent to us from the foundry with the
base of the sprue in place and the surface texture of the casting
untouched -- we do all of the clean-up in our workshop in order to
maintain the integrity of the volume and surface detail.
Step Five
|
|
|
Rough
castings as they arrive from the foundry
|
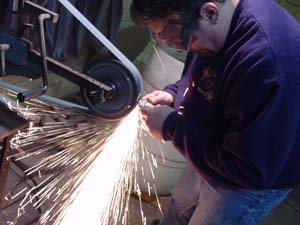
Once back at Albion, the hilt components have the large sprues carefully
ground away. An initial refinishing done on the entire component (there
is always a slightly "pebbly" surface from the investment
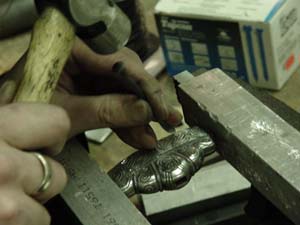
that must be polished away) and the piece is reviewed for flaws. Some
details that may have been lost in the casting process can be restored
with care.
 |
|
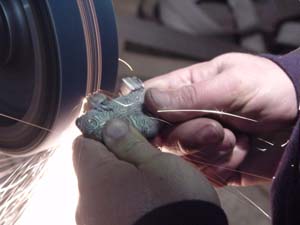 |
| Howy
grinding away sprues on a Vinland
casting |
|
Close-up
of the sprues on a Vinland
pommel |
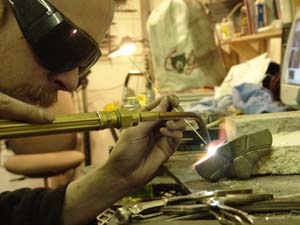
Some minor flaws are sometimes intentionally left in the component,
to recreate the "character marks" found on hand-forged hilt components.
 |
|
 |
| Kevin
Iseli restoring a flawed casting |
|
Kevin
restoring detail with a graver tool |
Once all detail has been restored, the component is prepped for assembly.
Though some processes, like cleaning up rough castings, are done as
batches, we treat each sword assembly as a separate project for both
craft and quality control reasons. One set of castings is individually
fitted to one particular blade as the first step of final assembly.
Step Six
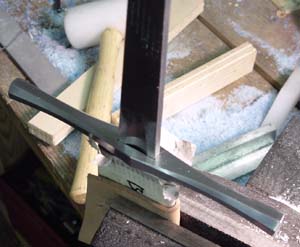 |
| Note the
tight fit of the guard on this NextGen Baron |
The
guard is first wedged on to the blade. The slot has been specially
cast to have a slightly undersized tang opening.
Hand filing brings the guard to within an inch of the base of the
blade . It is then the hammered into place, seating it firmly on the
shoulders of the blade.
The edges of the tang opening on the top of the guard are then "peened"
with a hammer to wedge the sides even more firmly against the tang.
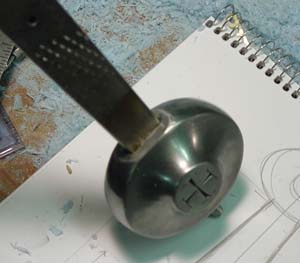 |
| Note the
tight fit of the pommel on this NextGen Baron |
Next, the pommel is fitted to the tang-end.
This also requires some hand-filing of the tang slot before the the
pommel is hammered into place, ensuring that it will seat firmly in
the proper location.
The pommel is then hammered on to the tang-end, wedging it permanently
into position at the end of the blade.
The end of the tang protruding from the pommel is then filed into
shape to prepare it for peening.
In some models, a decorative rivet block is also added: a separate
piece (usually a truncated pyramid shape) that sits flush on top of
the pommel.
Step Seven
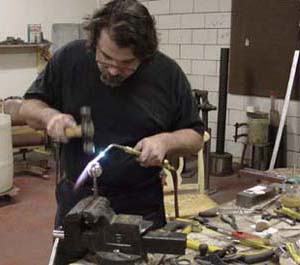 |
| Eric
McHugh hot peening a Museum Line Tritonia
|
The
sword is locked into a vise and heat is applied to the tang end. The
tang-end is then gently hammered until it fills the recessed cavity
in the pommel.
While cooling, the peen is either hammered flush or into a rough decorative
shape, depending on the demands of the particular sword model.
The peen is then carefully finished, by either being ground flush
and polished, or hand-filed into a decorative peen block. Where a
rivet block is required, the tang is then peend over the end of the
rivet block and then both the peen and the rivet-block are hand-filed
to final shape.
|
|
|
|
| A
decorative peen on the Solingen |
|
An
unfinished decorative rivet block on the Prince |
Note: due to the fact that the pommel is permanently wedged
into place on the tang, the peen is not what holds the sword together.
Each component is seated independently of the others.
Step
Eight
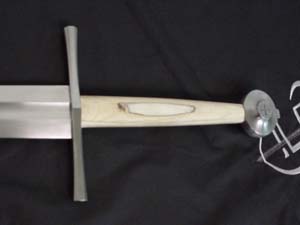 |
The birch
core fitted to a NextGen Baron
|
The
tang is then hand-fitted with a specially made stabilized birch core.
We use stabilized wood, as it is less likely to expand or shrink from
changes in weather and humidity, and is stronger and more durable
for heavy use.
The shape and volume of the core varies depending on the model of
sword.
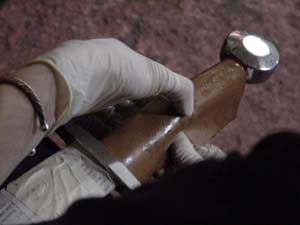
Once
the core is fitted and epoxied permanently into place, risers and
other details are added (as they were historically) using linen or
cotton cord.
The diameter, spacing and height of the cord risers vary depending
on the authenticity demands of the period.
 |
|
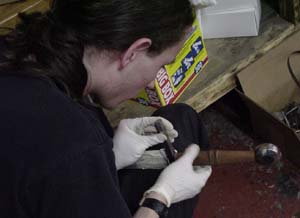 |
| Tristan
Waddington wrapping a Crecy
grip |
|
|
|

